
The GPIO Highjacker - Breakout your connectors!
The GPIO Highjacker solves a problem I had powering a Raspberry Pi used in the MountOne GoTo Telescope mount.
The embedded Raspberry Pi has two options for power input; 1 - USB and 2 - The GPIO. There are massive numbers of USB chargers, dongle, power cables, PDCs blah blah blah for the USB power in, but what is there for the GPIO?
Nothing*.

I have been experimenting with the Raspberry Pi SBCs since the very beginning and getting power into them is obviously important. Figuring out how to do that has always been a bit annoying. Even if you use the USB input, you still need to get power into the USB cable itself, this was generally achieved by cutting it up. It's all a bit messy. I don't like it.
With embedded projects, which is what I tend to build, the system power is normally 12v or 24v, the Pi wants 5v. The obvious solution is a DC/DC converter. Wiring a converter to the Raspberry Pi's USB is not pretty, as highlighted above. The cable's USB plug also takes up a huge amount of space, so I tend towards wiring directly into the GPIO, but his has it's disadvantages too.
With the rise of HATs and their hogging of the GPIO, feeding power into the GPIO can be somewhat difficult. Header extensions sort of fix the problem, but really they just move it further up the hardware stack. I know there are people who stack a lot of boards together, but I don't seem many of them. Usually it's just one or two. For me its the M.2 HAT.
The M.2 HAT comes with its own header extension, and when it is all assembled with spacers (which allows room for an active cooler below) there is less than 1mm of pin poking out the top. This leaves no room at all to connect power into the GPIO, or access any of the other many unused GPIO pins.

At this stage one would have to buy an extra long header extension and plug into that, but I don't like that, it's all very untidy and leaves the spare pins open and exposed.
Something needed to be done.

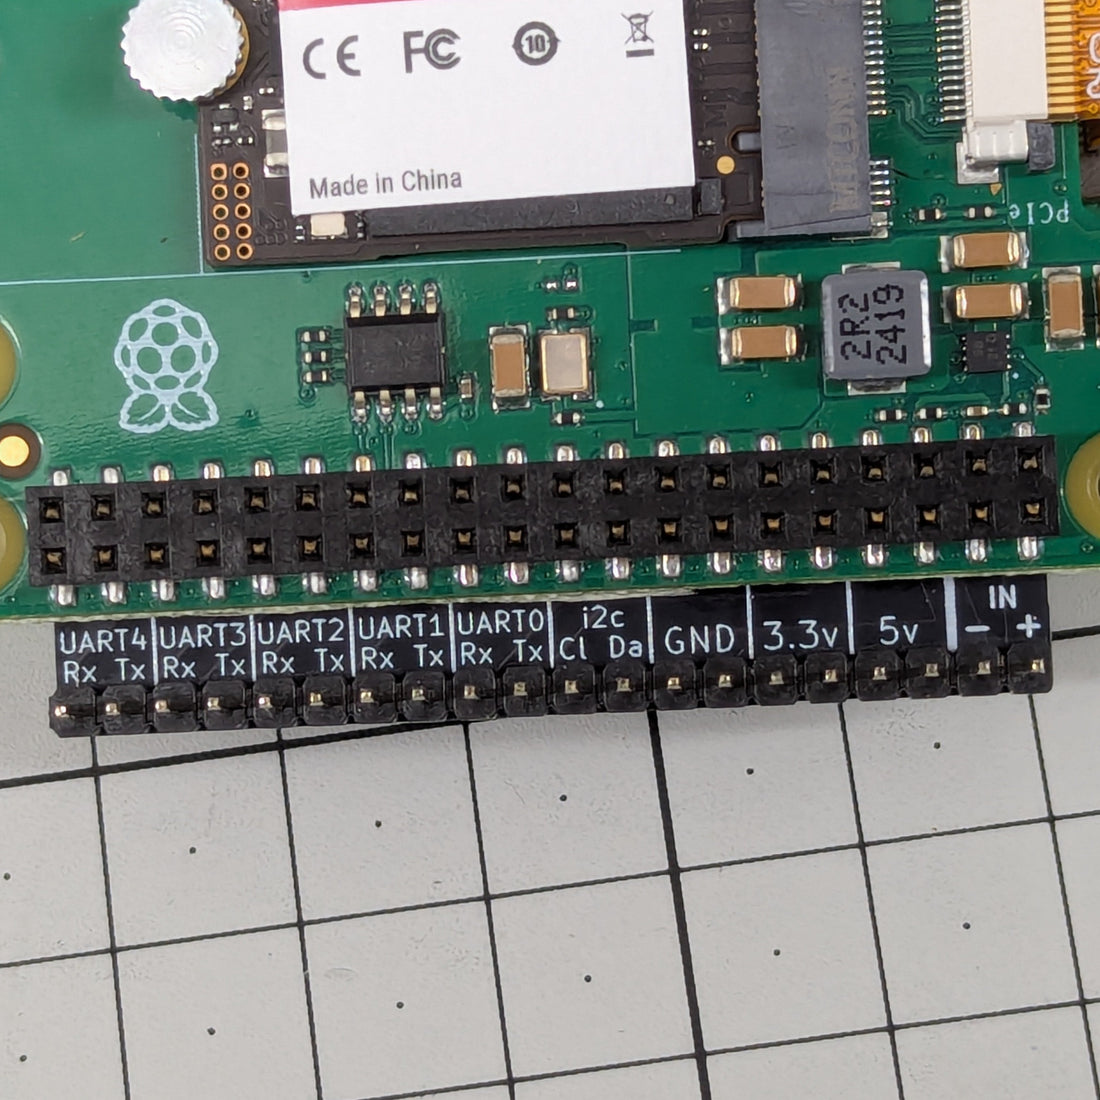
What started as a simple idea; make a PCB to solder to the Header Extension to provide power and a single UART, quickly grew into 5 UARTs, i2c, power in and power out.

The GPIO Highjacker is such a simple and elegant solution to what is a very cumbersome and untidy problem.
For the same price as an extra long header extension, you can use the extension you already likely have that came with your HAT, and get access to unused GPIO. I don't know why I didn't think of it sooner!
Get your GPIO Highjacker Now!
GPIO Highjacker Documentation.
*Well, not anything simple anyway.