

DryAF / DryAF Lite | Swapping out standard spools.


To Begin.
In this tutorial we are using a 1kg spool of Bambu Lab PLA-CF. The process for swapping spools is the same for DryAF & DryAF Lite. I have pre-printed the Material ID Tags and the Desktop Protector. These can be downloaded here - Printed Parts.
Please review all steps in this tutorial before starting (it is 99% images).

First Material ID Tag.
Fitting a Printed Material ID Tag.


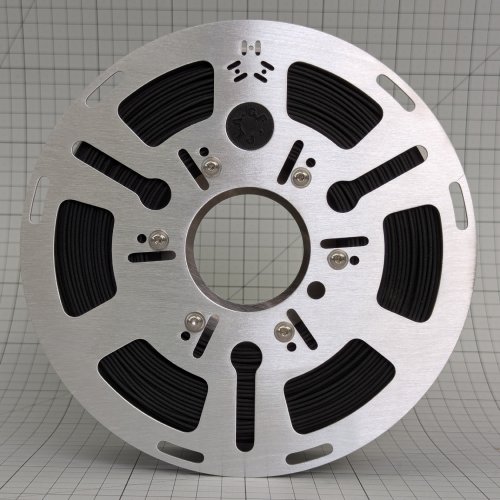
Installing The Spacers.


Take care to install the M4 Bolts in to the correct position.


Tighten the Bolts.


Unpack The Spool.
Put the part-assembled DryAF Spool onto the printed Desk Protector.


Splitting The Spool.
Hold the spool with the material label facing upwards.


Twist the upper side to release it.

Carefully, take the side off the spool.

Place the split spool onto your work surface.

Second Material ID Tag.


Place the DryAF side onto the split spool.

Flip The Spool.
Carefully, hold the spool tight.

Move the other half of the plastic spool close. We're going to use it as a base.

While holding the spool tightly, flip the spool.


Place it onto the plastic spool.

Stop The End.
Carfully, lift the other half of the plastic spool away from the filament.

Unstick the end from the plastic spool.....

....And stick it to the DryAF Spool.


The OtherSide.
Pick up the part-assembled DryAF Spool.

Guide the spacers into the canrdboard centre.


Grab the spool tightly using both hands.

Flip it over!

Place it back down again.

Final Fixings.
Secure the DrayAF Spool with the remaining Bolts.


Secure The Filament End.


Remove the bit of black tape, I just snap the end off.


Go Print!

Or store the spool for later use.


